

Can I Update My WordPress Website Myself?
Yes, you can update your WordPress website yourself. Most website owners can learn to change text, replace images, publish blog posts, and correct business information without writing code. Updating WordPress, themes, and plugins takes more preparation: check compatibility, create a recoverable backup, test important changes, and confirm the live website still works afterward.
The right approach depends on what you want to change and what your website does. Correcting a paragraph on an information page is different from updating a payment extension that processes customer orders. You do not need to become a developer to manage everyday content, but you do need to recognize when a change affects the whole site.
This guide explains how to identify your editing system, make routine content changes, handle software updates, protect search visibility, and recover from common mistakes. It focuses on self-hosted WordPress. WordPress.com and managed hosting services may handle some maintenance for you or provide different controls. Menu names and buttons can vary with your WordPress version, theme, plugins, permissions, and hosting arrangements.
What Updating a WordPress Website Actually Means
People use the word “update” for several different jobs. A content update changes information visitors read: a service description, staff profile, price, photo, or article. A design update changes presentation, such as spacing, navigation, colors, or page layouts. A software update installs a newer version of WordPress, a theme, or a plugin.
These jobs can overlap. Replacing a homepage image may be straightforward, but changing the template behind that homepage can affect other pages. Updating a restaurant menu PDF may be a content task, while upgrading the online ordering system changes software that customers rely on to place orders.
Start by writing a specific goal. “Change the contact page phone number” is clear enough to check. “Improve the website” is too broad for a first editing session. A small scope makes it easier to identify the right control, verify the result, and reverse a mistake.
Which Tasks Are Suitable for Beginners
| Task | Typical difficulty | Sensible approach |
|---|---|---|
| Correct text on an existing page | Low | Edit one page and check the published result |
| Replace an ordinary content image | Low to moderate | Preserve its intended shape and check mobile cropping |
| Publish a blog post | Low to moderate | Preview headings, links, images, and publishing settings |
| Change a shared header or menu | Moderate | Identify every place it appears and test mobile navigation |
| Update plugins or themes | Moderate to high | Use backups, compatibility checks, staging, and functional tests |
| Change PHP, payment logic, or custom code | High | Arrange qualified technical support and a recovery plan |
These are practical judgments rather than a guarantee of safety. A simple-looking field can control an important function on a heavily customized website.
Before You Begin Editing
Confirm Access and Responsibilities
Sign in through the login address supplied by your website provider. Many installations use /wp-admin/, but security settings may change the address. Use your own account so that changes can be traced to the person who made them.
WordPress permissions determine what you can do. Editors normally manage content, while Administrators have broader access to site settings and software. An Author account may be suitable for someone publishing their own posts but will not provide all page management capabilities. Custom roles, multisite networks, and hosting policies can change these defaults. If an option is missing, ask the administrator to check your permissions rather than installing a workaround.
Also establish who maintains the site. A hosting company, agency, or maintenance provider may already manage updates. Agree on ownership before making parallel changes, especially where automatic updates and scheduled deployments are involved.
Find Out How the Page Was Built
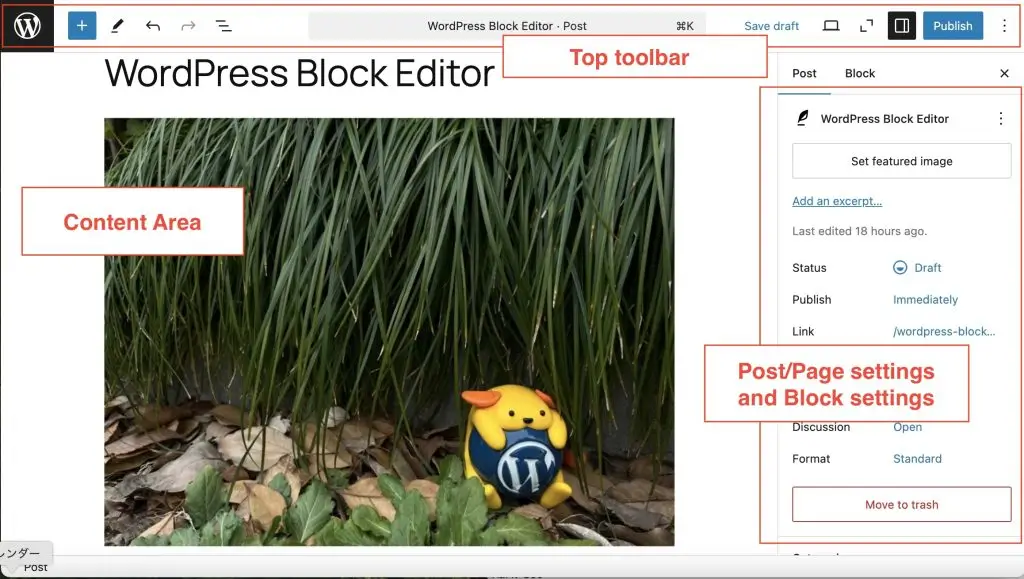
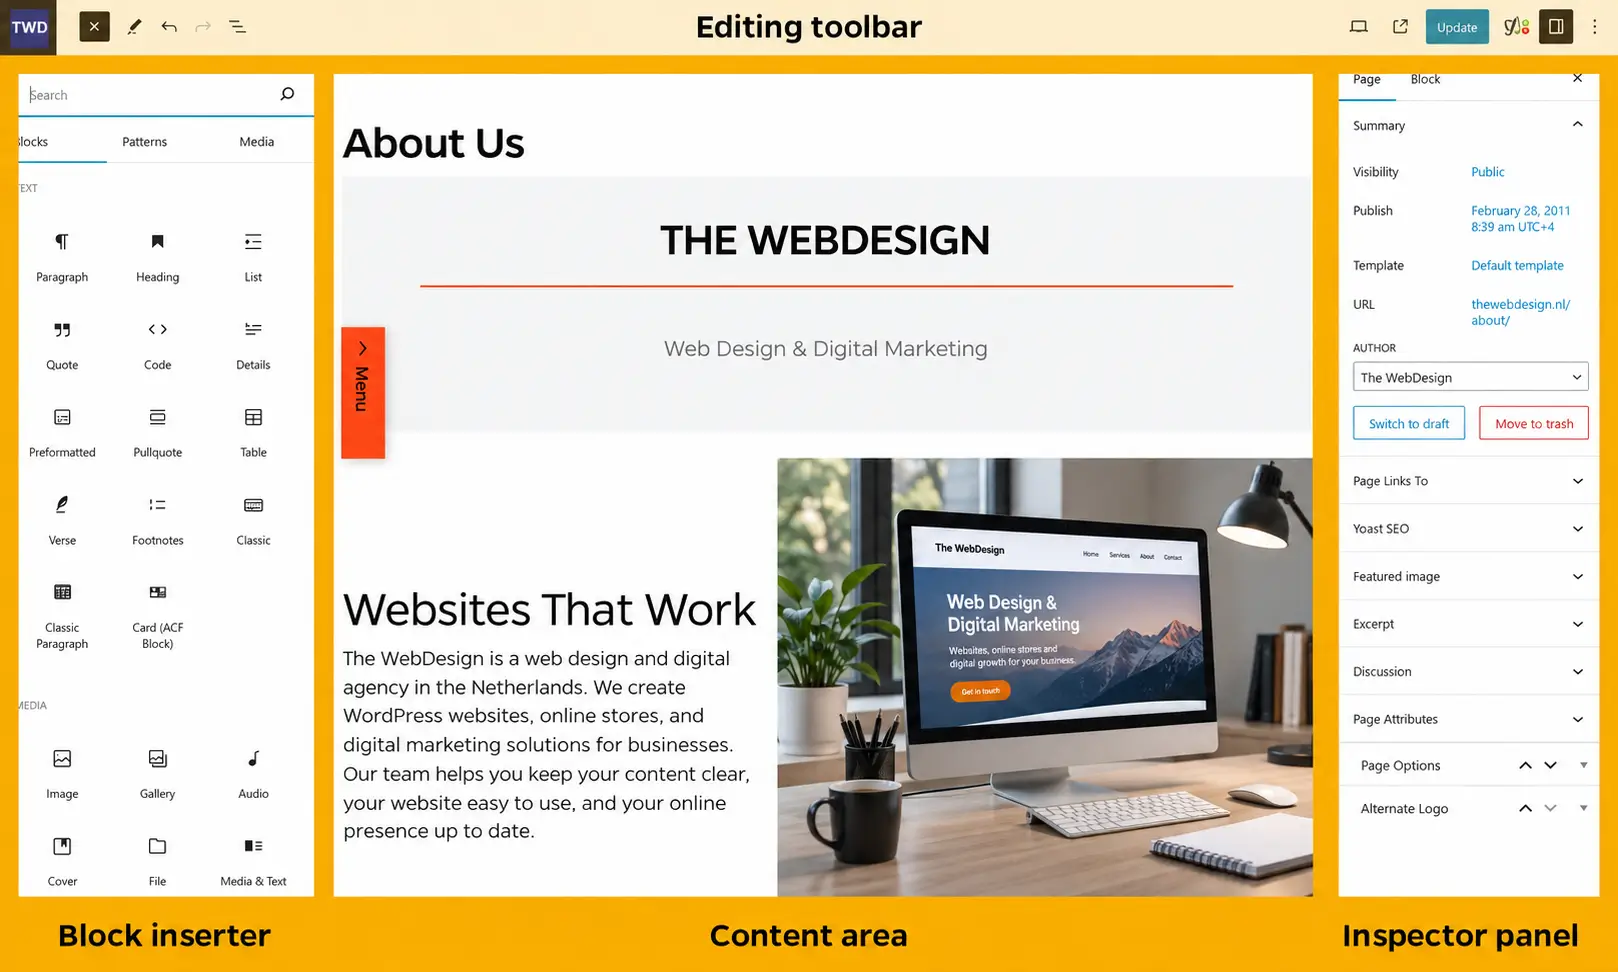
Open Pages and locate the page you want to change. A screen made of paragraph, heading, image, and other blocks indicates the WordPress block editor, often called Gutenberg. A button such as Edit with Elementor indicates a separate visual builder. Some websites use the Classic Editor, custom fields, or a mixture of systems.
A page that appears empty in the standard editor may still have a complete design elsewhere. Do not rebuild it immediately. Its content could come from a builder template, a custom field group, a product record, or a theme setting. Ask where the visible information is stored before changing the structure.
Prepare a Useful Recovery Point
For a small content correction, note the original wording and check whether revisions are available. For software, shared design, or larger content changes, confirm that you have a current backup of the database and site files. A database alone will not preserve every uploaded image or plugin file; files alone will not preserve the complete database content.
A practical backup check asks four questions: When was it created? Did the job finish successfully? What does it include? How would you restore it if the dashboard stopped working? Keep backup access outside WordPress where possible, through your hosting account or backup service. Periodically test restoration in a separate environment instead of discovering the process during an outage.
Record What Currently Works
Before a consequential change, open the affected page and complete its main action. Capture a reference screenshot, note the existing destination of its main button, and record any important settings. For a booking page, confirm the form can be submitted and that the expected notification arrives.
This creates a meaningful baseline. “The website loads” is too weak if the website exists to generate enquiries, reservations, or purchases.
How to Edit Text on an Existing WordPress Page
Step 1: Open the Correct Page
From the dashboard, go to Pages, then All Pages, and find the page by its title. If several pages have similar names, check the public address and language before editing. Open the live page in a second tab so you can compare the content.
For a blog article, use Posts instead of Pages. If your website has multiple language versions, identify whether each language has a separate page or is managed through a translation interface. An English edit will not necessarily update the Dutch version.
Step 2: Select the Content You Intend to Change
In the block editor, click inside the relevant paragraph or heading. Use List View when nested groups make the right block difficult to select. Blocks have their own settings, so make sure you have selected the text itself rather than its surrounding container. WordPress documents the block toolbar and settings sidebar as separate controls.
Change a small amount first. Paste plain text when copying from an email or document to reduce unwanted formatting. Keep the original heading levels unless the content hierarchy genuinely needs to change.
Step 3: Update Wording and Links Carefully
Replace the required information and read the whole paragraph again. A changed price may also require changing the surrounding conditions, button text, or downloadable brochure. Check for duplicated details elsewhere, including the footer, contact section, and translated page.
For a link, select its text, open the link control, and verify the complete destination. Use wording that tells readers where the link leads, such as “View our catering menu.” Test telephone and email links on an appropriate device after publishing.
Step 4: Preview Without Publishing
Use the available preview controls and inspect the page at desktop and mobile widths. Look for a headline wrapping awkwardly, a button pushed below an image, or a list that has lost its spacing. Preview is useful, but it does not replace checking the live site.
Avoid changing unrelated settings such as the page URL, template, visibility, or publish date during a simple wording correction. Those settings solve different problems and can create unintended consequences.
Step 5: Save and Check the Public Result
Use the appropriate Save, Update, or Publish control for your editor. Editing a published page and saving it can make changes public immediately. If the revision needs approval, use your existing editorial workflow or a protected copy rather than assuming every save is private.
Open the public page in a private browser window. Confirm that the new text appears, its links work, and the layout remains usable. If you still see the old version, follow the caching checks later in this guide before repeatedly editing the same page.
How to Replace an Image Without Damaging the Layout
Start with the purpose of the image. A wide banner, square product photo, and portrait team image need different compositions. Review the existing display area before choosing a replacement; matching its aspect ratio often reduces cropping issues.
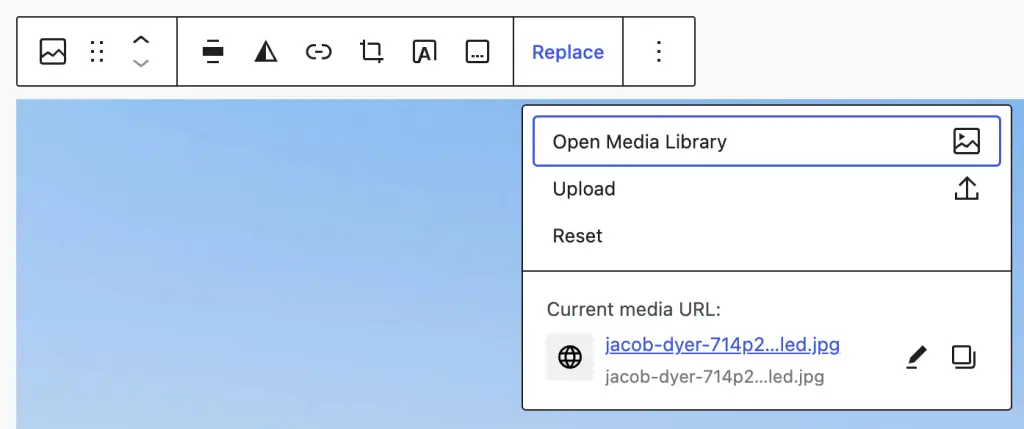
1. Open the page in its existing editor and select the image block or image widget.
2. Use its replace or media selection control and upload an image you own or have permission to use.
3. Choose dimensions appropriate for the display area and compress the file to avoid unnecessary download weight.
4. Check the image size setting, crop, focal point, and any responsive options your editor provides.
5. Write alternative text that communicates the image’s relevant meaning. A purely decorative image should generally have empty alternative text.
6. Preview and publish, then check the actual result on a phone and a larger screen.
Do not put essential prices, opening hours, or service details only inside an image. Text is easier to update and more accessible when it remains readable page content. Avoid filling alternative text with repeated keywords: a useful description serves the reader better.
Replacing an image selection in one block does not automatically update every appearance of a related photo. Conversely, editing a shared media file through a replacement tool can affect several pages. Confirm the scope of the specific action before saving.
How to Publish a New WordPress Blog Post
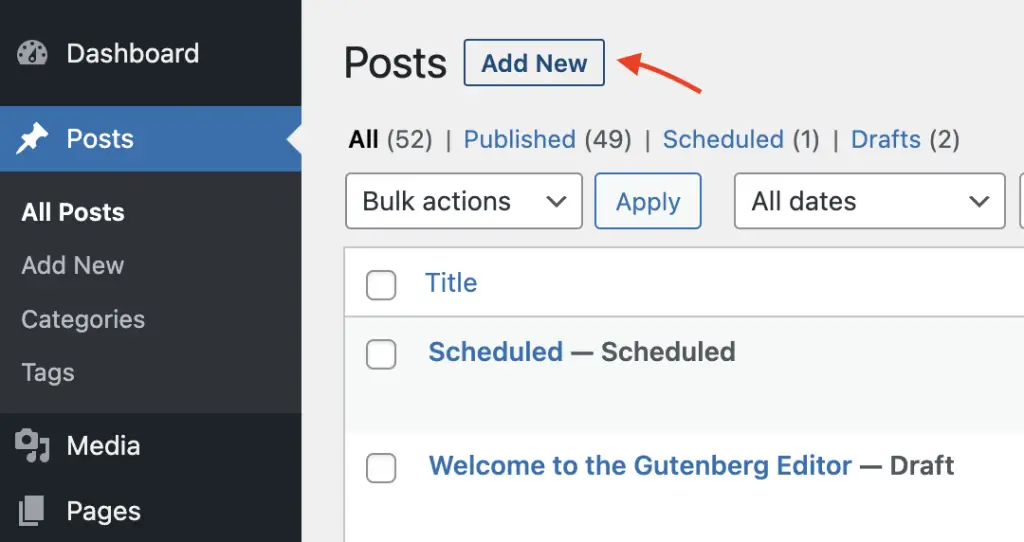
Go to Posts and choose the option to add a new post. Write a clear title that accurately describes the subject, then build the article with paragraphs and descriptive headings. Use a main page title and a logical sequence of section headings; choose heading levels for structure rather than appearance.
Add relevant images and descriptive internal links. Select a suitable category, check the featured image, and review the excerpt if your theme uses one. A featured image can display differently in an archive card and at the top of the article, so inspect both placements.
Check the post’s address before its first publication. Keep it descriptive and stable. If your SEO plugin exposes a title and meta description, write a concise summary that matches the article. Those fields help describe the page but do not guarantee the wording a search engine will display.
Preview the post, proofread it, and check its publication status, date, author, and timezone. Publish or schedule it deliberately. Then open the public article, confirm its links, and ensure readers can find it from the appropriate blog listing or relevant internal page.
For a factual tutorial, include useful references and an accurate author profile. Add experience only when it is real: a documented workflow, an actual screenshot, or a clearly described test is more trustworthy than an unsupported claim that a method always works.
How to Edit Elementor Pages and Custom Fields
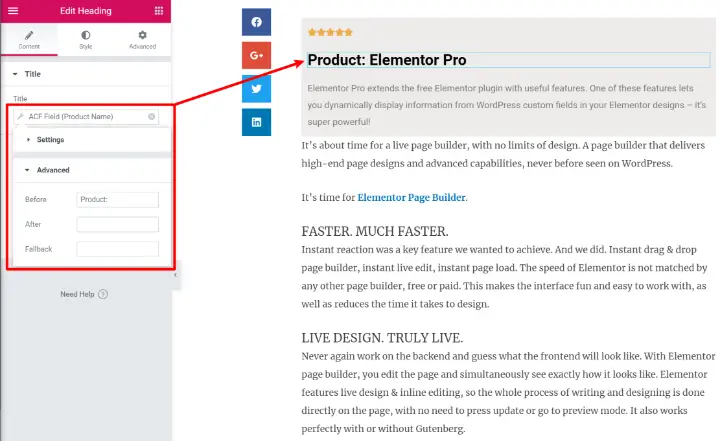
If the page uses Elementor, open it through Edit with Elementor and select the relevant text, image, or button widget. Make the specific change in its controls, inspect responsive views, save through Elementor’s publishing controls, and test the live page. Exact labels depend on the installed editor version.
Check whether the widget gets its value from a dynamic source. A heading could display the page title, a custom field, or a global setting. Editing the wrong layer may produce no visible result or disconnect content from the system intended to manage it.
For custom fields, including ACF-based websites, use the labeled field designed for that information. For example, a restaurant page may have separate fields for opening hours, address, and booking URL. Change the value without removing field groups or renaming keys. If a field contains HTML, do not delete tags, classes, or embedded code while correcting its wording.
Be especially careful with shared templates and global elements. A header, footer, or reused promotion can appear across many pages. Preview more than the page you happened to open. Elementor’s official update guidance also recommends release documentation, add-on compatibility checks, backups, and staging for software upgrades.
How to Change Menus and Shared Website Sections
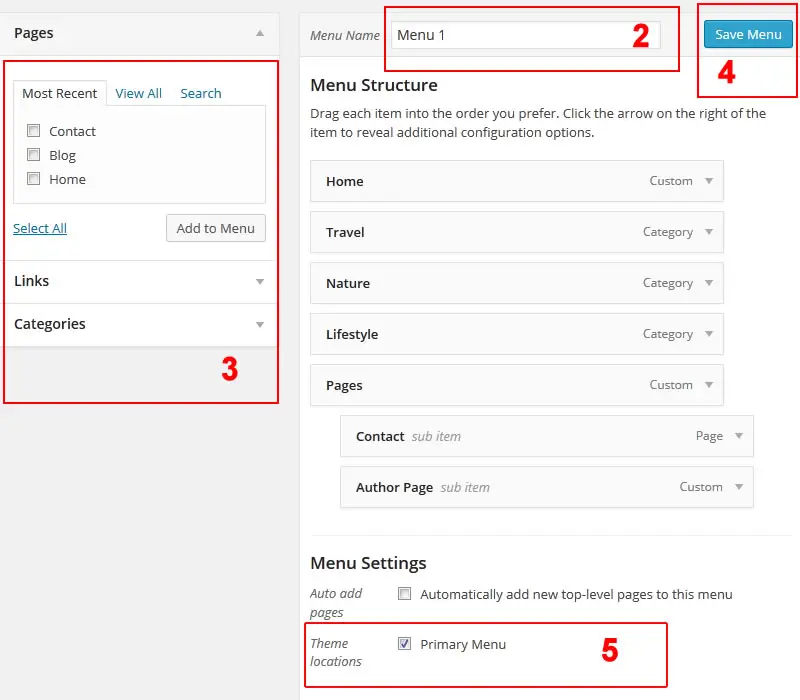
Navigation controls depend on the theme. A block theme can expose navigation through Appearance and the Site Editor. A classic theme may use Appearance and Menus, while some builders manage headers through their own templates. An absent menu item does not automatically mean your installation is broken.
Before changing a menu, identify its location: main header, footer, mobile overlay, or another section. Add the existing destination page where appropriate, use a short, understandable label, and check the address. Save, then test both the desktop menu and the mobile open and close behavior. WordPress’s Navigation block supports menu links and nested items, but the available controls can vary.
Remember that changing a menu label does not change the destination page’s title or address. For example, renaming a navigation item to “Services” can leave its destination unchanged. Test the result instead of assuming that the visible label proves the link is correct.
How to Update WordPress Software Safely
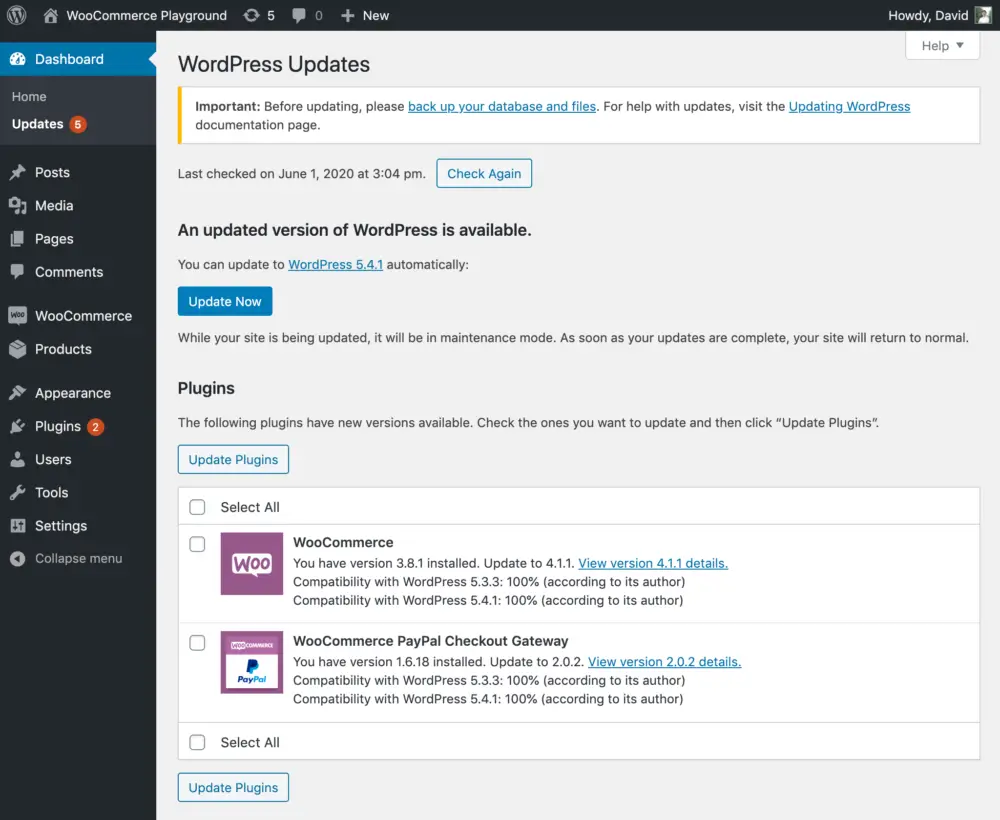
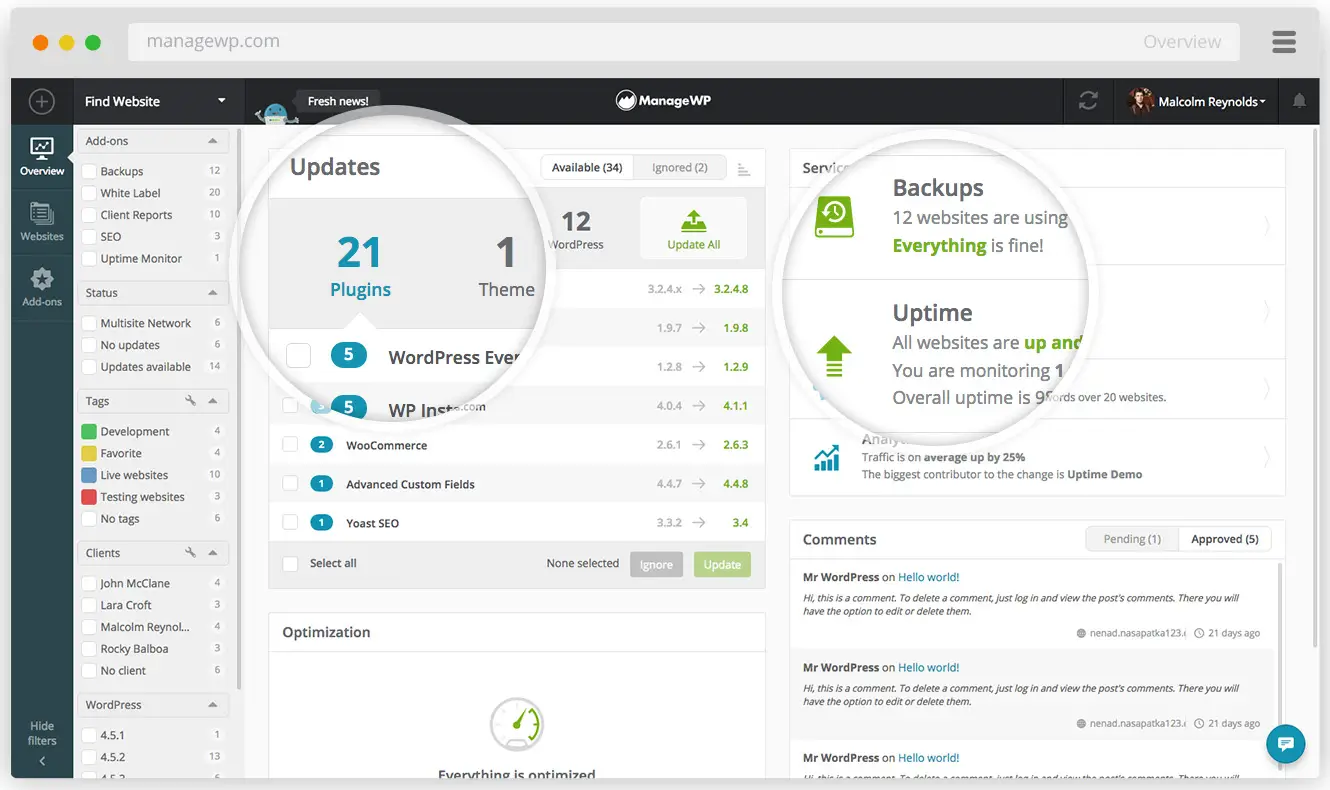
Software maintenance deserves its own workflow. WordPress core, themes, and plugins work together, and a newer component may introduce changed requirements. Official WordPress guidance explicitly states that there is no single update order suitable for every website. Follow compatibility requirements and release notes for your particular combination.
Step 1: Review the Proposed Updates
Open Dashboard and Updates, and review the available versions. Check vendor release notes for important changes and required dependencies. Record the installed and proposed versions of critical components so that a support provider can understand the change if something fails.
Confirm access to legitimate premium updates where applicable. If a license has expired, resolve the update route with the vendor or site provider. Avoid downloading replacement copies from unofficial sites simply to remove a dashboard warning.
Step 2: Confirm the Rollback Plan
Create or verify a recent full backup before proceeding. Know whether your recovery process restores files, the database, or both, and who can initiate it. On a site receiving orders or bookings, consider what new records could arrive between backup and recovery.
Restoring an old database can remove transactions created after the backup. That is why recovery is a business decision as well as a technical action. Agree on a maintenance window and a way to preserve or reconcile new activity before making high-impact changes.
Step 3: Test the Update Set on Staging
Staging is a separate copy of the website used for testing. Use your host’s documented process or a properly configured development environment. Protect it from public access and indexing, and check its email, payment, webhook, and scheduled task settings so tests do not trigger real customer activity.
Apply the required updates on staging in the order specified by their dependencies. Test the exact combination you intend to use on production. A successful test on a different set of versions provides weaker evidence about what will happen on the live site.
Step 4: Run Tests Based on the Website’s Purpose
Write down what must work before you start. For a service business, test the enquiry form, validation messages, confirmation screen, and message delivery. For a restaurant, test reservations, ordering links, opening hours, and the mobile menu. For a membership site, test login and access restrictions.
Check several page types rather than only the homepage. Include a service page, an article, a search or archive page, and any page relying on the updated plugin. Compare their behavior with the baseline you recorded earlier.
Step 5: Apply the Verified Updates to the Live Site
Choose an appropriate maintenance window and take a fresh backup if the live site has changed since preparation. Use a controlled maintenance or checkout pause where needed to prevent visitors from starting transactions during an interruption.
Run the tested update sequence and wait for each operation to finish. Avoid repeatedly refreshing or starting overlapping update jobs. If a component requests a database upgrade, follow its vendor instructions and confirm completion before considering the work finished.
Step 6: Test Again and Monitor
Repeat the critical tests on production. Staging can differ in server configuration, caching, integrations, and traffic, so passing there does not eliminate the need for live verification.
Check update notices and monitoring alerts, review any errors, and record the outcome. An update is complete when the website’s required functions work, rather than when the dashboard’s update count reaches zero.
Extra Precautions for WooCommerce and Booking Websites
Transactional sites need greater care because failures can interrupt payments or lose reservations. WooCommerce’s official instructions call for a current backup, staging tests, any required database updates, and verification of store workflows after updating.
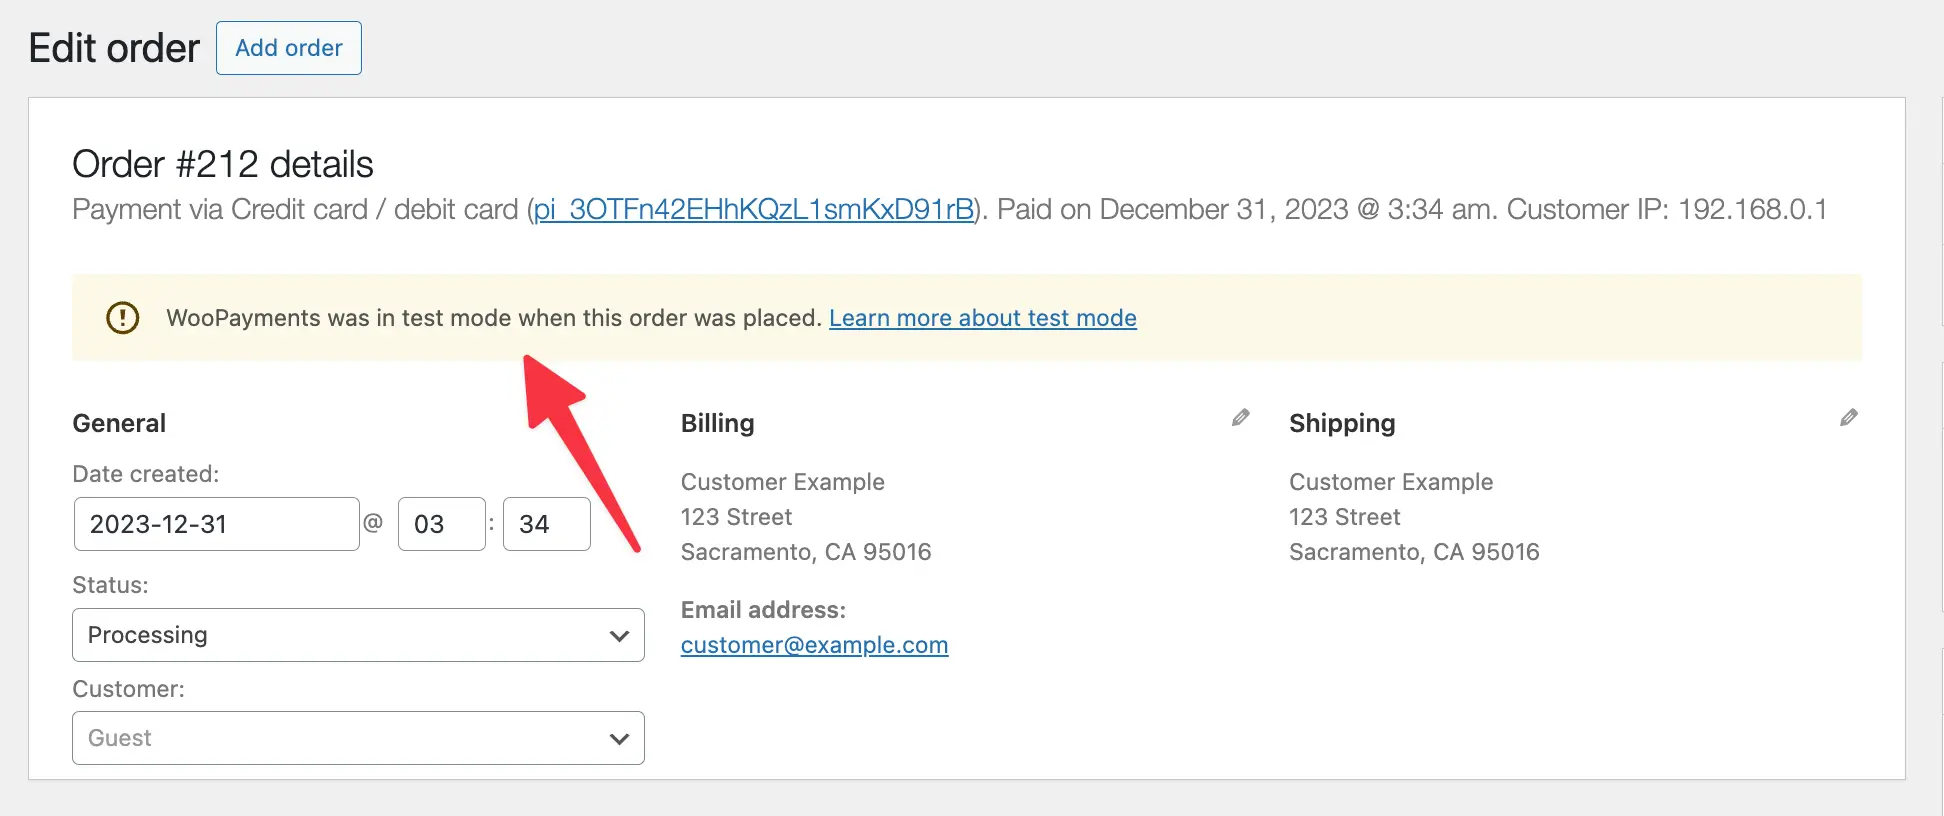
Use a short acceptance checklist covering product display, cart, checkout, payment behavior, delivery options, order creation, and confirmation messages. Test the payment method through an appropriate sandbox or another controlled process agreed with the business. A checkout page loading successfully does not prove that a payment or order notification works.
For a reservation website, check date selection, party size rules, time availability, submission, and notification delivery. If the form connects to an external booking platform, verify that the booking actually appears there. Keep real customer data out of unnecessary test copies.
Deploy the verified code and configuration through a process that preserves live transactions. Copying an older staging database over a busy live website can overwrite recent orders, customer accounts, or bookings. Ask a specialist to plan deployment when you cannot confidently separate software changes from changing business data.
Should You Enable Automatic Updates?
Automatic updates can reduce the time a site remains on outdated software, but they do not prove that the website remains functional. WordPress provides automatic update controls for supported plugins and themes; hosting configuration and management tools may also influence update behavior.
Choose a policy based on the consequences of failure. A modest brochure site with reliable backups and monitoring may suit a different policy from a customized shop with several payment and inventory integrations. Establish who receives notifications and how quickly someone will investigate a failed form or checkout.
Do not treat disabling automatic updates as permission to ignore maintenance. If you prefer controlled updates, make the schedule and responsible person explicit. Security releases may require action sooner than the next routine maintenance session.
How to Protect SEO When Updating Your Website
Routine improvements to text do not require changing the page address. Preserve established URLs where practical, keep useful internal links, and maintain a clear heading structure. Replacing a page with a visually attractive version that removes important service details can reduce its usefulness to both people and search systems.
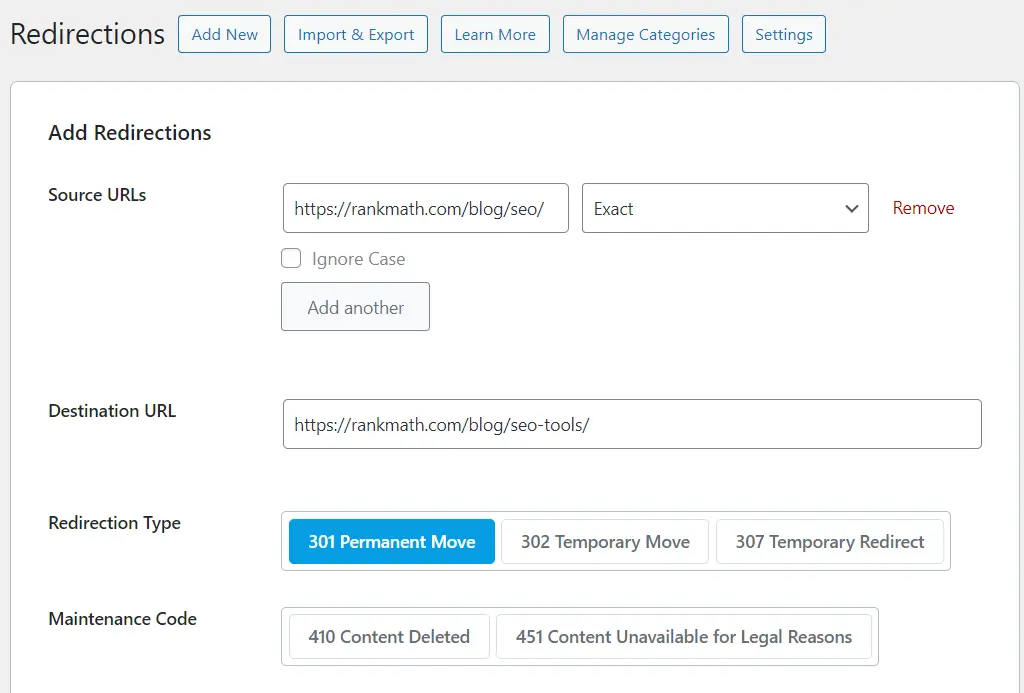
If an address genuinely must change, plan an appropriate permanent redirect from the old URL to the relevant replacement and update internal links. Ask for help when changing multiple addresses, a domain, or the site’s overall structure. These changes deserve more review than an ordinary paragraph edit.
After significant edits, confirm the live page remains publicly accessible and has not accidentally inherited staging restrictions. Review canonical and indexing settings with your existing SEO setup. Do not change them simply because a plugin displays an unfamiliar warning.
Use original explanations, accurate business information, and sources that support technical claims. Google’s people-first content guidance encourages useful, trustworthy material and transparent authorship. Adding a review date is appropriate when a real review took place; changing a date alone does not improve the underlying information.
What to Do If Something Goes Wrong
The Public Page Still Shows Old Content
First, confirm that you saved the correct page and language version. Open a private browser window and compare it with the editor. Your browser, a caching plugin, the host, or a content delivery network may serve an older copy.
Use the relevant provider’s cache purge control, starting with the affected page where supported. Avoid disabling several performance or security systems at once. If the editor and public page still disagree, check whether the visible content comes from a template or dynamic field.
A Text Edit Damaged the Page
If the mistake is still in your editing session, use Undo. If you already saved it, open the page’s revisions, compare the relevant versions, and restore the appropriate one when available. Then verify the public result.
Revisions are useful for supported content changes, but they are not a complete website backup. Do not expect a page revision to reverse a plugin installation, a payment setting change, or every third-party custom field. Availability and retention can depend on configuration.
A Software Update Caused an Error
Stop unrelated changes and record the error, affected addresses, and last update. Check your hosting support channel and any legitimate recovery instructions sent to the administrator. If WordPress offers Recovery Mode, use the genuine site-related recovery link and investigate the identified component.
When the dashboard is unavailable, or you cannot safely diagnose the fault, contact the host or maintenance provider. Explain the last known working state and backup time. Avoid deleting plugins, editing production PHP, or restoring an old database without understanding the consequences for recent activity.
A Manageable Maintenance Routine
Keep content accurate whenever something changes, especially contact information, prices, availability, and key service conditions. Schedule a regular maintenance review for software notices, backup success, and important user journeys. The appropriate frequency depends on the website’s activity and risk; it is a working policy rather than a universal timetable.
A practical review includes checking new release notices, testing forms, confirming backup access, and looking for broken journeys on mobile. Give urgent security issues and active failures priority over the routine schedule.
Keep a short change log with the date, person responsible, page or component, reason, and test result. Even a simple shared record can help connect a later problem with an earlier change. Review who has administrator access and whether premium component licenses still have a working renewal owner.
When to Ask a WordPress Professional for Help
Get technical help when the potential impact exceeds your ability to test and recover. Common examples include major upgrades on a neglected site, a PHP change, recurring critical errors, payment failures, malware, migrations, custom integrations, and changes to shared templates you do not understand.
Ask for a specific handover if you want to manage more content yourself. Request a demonstration of your actual editor, labeled editable fields, backup access instructions, and a list of changes that require support. A short recording showing your own pages is often more useful than a generic tutorial for a different setup.
You can also divide responsibilities: manage articles, photos, and service details yourself while a technical provider handles software maintenance and recovery. Choose the arrangement that gives the business a dependable website and a clear person to contact when something fails.
Frequently Asked Questions
Yes. Most routine page and post changes use visual editing controls. Coding knowledge becomes more relevant when changing custom functionality, debugging compatibility issues, or modifying code-based templates. Your website’s construction determines which tasks are straightforward.
Start with One Controlled Change
Choose a small content improvement, identify the correct editor, preserve a recovery option, preview the change, and check the public result. As your confidence grows, expand the tasks you manage while keeping software maintenance tied to compatibility checks and meaningful testing.
If you need help identifying which parts of your WordPress website you can manage, The WebDesign can help you assess the setup and plan a practical editing and maintenance workflow. Begin with a clear list of the changes you want to make so the next step matches the needs of your business.

Search
Categories
Recent Posts
- 20 Dec, 2024 Building Brand Loyalty: How Custom Mobile Apps Drive Business Success
- 12 Nov, 2026 Can I Update My WordPress Website Myself?
- 17 Jan, 2025 Designing An Attractive and Truly User-Friendly Website!
- 23 Dec, 2024 Driving Sales Through Online Channels: Transforming Your Business with a Webshop
- 09 Sep, 2024 Enhancing Customer Engagement: The Business Benefits of Mobile App Development
- 23 Dec, 2024 Expanding Market Reach: The Strategic Value of an E-commerce Webshop
- 10 Mar, 2026 Google Review Card: NFC vs QR – What Works Better?
- 01 May, 2026 Google Tools for Websites: A Complete, Detailed Guide for Website Owners, Developers, and Marketers
- 09 Sep, 2024 Harnessing Professional Web Design: Elevating Your Business’s Online Presence
- 13 Jun, 2026 Headless CMS vs Traditional CMS: Which Should Your Business Choose?
- 09 Sep, 2024 How an Online Delivery System Empowers Business Operations
- 07 Aug, 2026 How can a Dutch company get cited in ChatGPT, Gemini, Perplexity, and Copilot answers?
- 18 Sep, 2026 How can I choose a reliable web development company in the Netherlands?
- 07 Sep, 2026 How do I improve local visibility in ChatGPT and Microsoft Copilot, not just Google Maps?
- 20 Jan, 2025 How To Build A Custom Website For Your Business?
- 31 Aug, 2026 How to Choose a Digital Marketing Agency in the Netherlands: Services, Costs and a Practical Checklist
- 20 Jan, 2025 How To Create A Professional Website For Building Online Presence?
- 02 Aug, 2024 How to Plan a Perfect Digital Market
- 25 Jun, 2026 How to Work With a Web Design Agency to Grow Your Online Presence?
- 23 Dec, 2024 Investing in Website Development: Enhancing Customer Engagement and Conversion Rates
- 23 Dec, 2024 Meeting Customer Expectations: The Competitive Edge of an Online Delivery System
- 23 Dec, 2024 Optimizing Logistics: Enhancing Business Agility with an Online Delivery System
- 17 Jan, 2025 Optimizing Your Website with a Website Builder in Amsterdam
- 20 Jul, 2026 Progressive Web Apps (PWA) vs Native Apps
- 22 Apr, 2026 SEO vs GEO: The Future of Search in the Age of AI
- 03 Apr, 2026 The 10 Biggest Mistakes When Building a Website – and How to Avoid Them
- 27 Dec, 2025 The Cost of Getting a Website Made: What You Can Expect in the Netherlands?
- 09 Sep, 2024 The Essential Role of Online Marketing for Businesses
- 20 Dec, 2024 The Power of Digital Storytelling: Leveraging Online Marketing to Connect with Customers
- 23 Dec, 2024 The Strategic Advantage of a Well-Designed Website for Business Growth
- 23 Dec, 2024 Unlocking Market Potential: How Strategic Digital Marketing Propels Business Success
- 09 Sep, 2024 Unlocking Revenue Streams: Establishing an Online Webshop for Your Business
- 06 Jul, 2026 Web Performance Optimisation: Core Web Vitals
- 22 Oct, 2026 What Happens After Your Website Goes Live? A Guide to Aftercare and Support
- 03 Aug, 2026 What is an E-commerce Website and How Does It Work?
- 27 Mar, 2026 What is sitemap.xml and Why Is It Important for SEO?
- 15 Apr, 2026 What Is the Difference Between Shopify and WordPress?
- 15 Jan, 2026 What Makes a Website Design User-Friendly?
- 30 Jul, 2026 What’s Allowed/Not Allowed With Google Reviews?
- 21 Mar, 2026 What’s Involved in Having a Website Created: A Step – by – Step Guide
- 27 Feb, 2026 What’s Involved in Having a Website Created: A Step-by-Step Guide
- 21 Jan, 2025 Why Consider WordPress for Website Builder?
- 21 Jan, 2025 Why Do Businesses Hire WordPress Website Builder Companies?
- 20 Jan, 2025 Why Does Your Business Need a Local Web Design Agency?
- 12 Aug, 2026 Why Is My WordPress Website Slow and How Can I Fix It?
- 11 Dec, 2025 Why You Should Have a Professional Website Built in 2026: What’s Changing?